
We use the attic ladder about 6 times a year, twice at Christmas time, Easter and some other random holiday. Not something to think much about, but as time wore on, the ladder wore out. After I realized that the legs were too long I contacted the manufacturer and they emailed me the original instructions. There in big BOLD letters was the phrase "DO NOT CUT TRUSSES" I realized that the original installers had also skipped that step and installed the ladder by cutting apart the bottom of the truss to make it so the ladder would open along the length of the garage instead of the width. Unfortunately cutting trusses makes them weak. A truss is a triangle made up of smaller triangles, if you cut any one of those triangles you make the whole structure weak and can end up causing damage. I realized that not only did I need to install a new ladder and cut the legs to the right length I had to turn the ladder 90 degrees and install it along the trusses. The ladders are even made to fit between 24" on center truss alignment, which I have in my attic.
Mind you I didn't just figure this out, I've known about this literally for years, I've just put it off. A few months ago Sandi made a todo list for the house and on it was the attic ladder. I had Martin Luther King Jr. day off from work and while cleaning up my email I noticed the todo list and thought "I could get this done today and that would be a great use of a day off" little did I know.
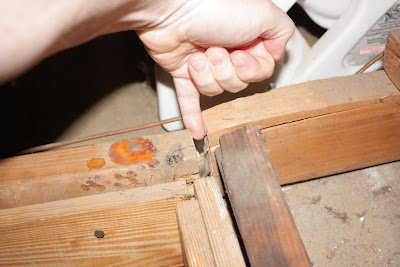
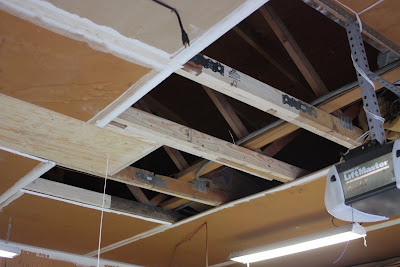
Taking out the ladder was a lot harder than I expected. While most of the nails that had originally been used to install it were loose there were some that were nailed in to other boards that themselves were loose. The whole structure was completely unstable. I removed all but four screws I had put in later to stabilize it. I had hammered out one end of the ladder box since one side of the ladder was no longer being held up by a spring assembly. This allowed me to work on each side separately, what I did not realize was the spring assembly that was attached would bring the exposed nails slashing across my arm as I removed the last screw. It was one of those moments when you think, gosh I wish I hadn't done that. It's not an emergency, but I really don't want to get blood on this nice shirt. Tyler had been helping me so I sent him in to get Sandi she was in no rush to come out because I told her not to, I realized that she did need to rush and we got it bandaged up and I was back to work. Now I had a hole in the ceiling with a three cut trusses and a bunch of extra cross bracing I no longer needed. I removed all of the old cross bracing, it was what the ladder was attached to, and prepared to repair the trusses.
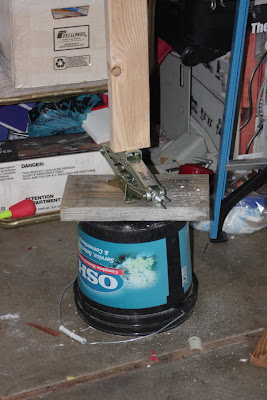
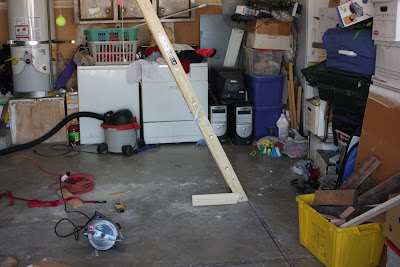
Since the trusses were cut, I bought some "green" 2x4" lumber to "sister" along the trusses and screw between the sister and the original truss. Since the truss had been cut, the ceiling of the garage had started to sag. I knew I needed to jack the ceiling back up so I grabbed a sturdy bucket, flipped it over, put a 2x6 on there and a car jack. Then I stood up one of the 8 foot 2x4" and another piece of wood at the top to spread out the pressure. I turned the jack as Tyler watched the new 2x4 and the existing truss "level out" I wasn't really sure how far I should jack it up, I just wanted both sides of the cut truss to be even and I figured the only way that would happen is if the truss was jacked to be level with the shorter side first, screw it in, then move the jack to the other side where more sagging had happened and screw that together. Little did I know.
In the process of vacuuming out accumulated insulation and dust I discovered that one of the trusses on the other side of a joint was cracked. I used all 8 feet of the 2x4 to extend past that point and screw the cracked truss to the new lumber. I will eventually go back and drill bolt holes and put a reinforcing plate on there. Cutting the truss had no only caused the truss to expand, it also caused it to pivot around a point and cause it to crack.
It took me so long to fix the first two trusses that I stopped for the night. I bought another non-green 2x4" the next day to fill in the places that were cut out and used it to jack up the last of the three cut trusses and screwed that all down tight.
The next night I cut out the opening for the new ladder.
Now we're at Thursday night and all is set for getting the ladder in the attic, unfortunately we had company and Tyler was busy so I thought I would rig up my own little pulley system so that I could have the ladder hang in the right place while I nailed it in. This worked pretty well until the come along that I was using as a pulley got above the ceiling and I couldn't make it move any more.
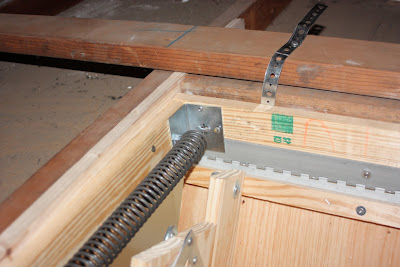
 Tyler and the person visiting him helped me lift the ladder in to place in then use the provided metal straps to hang it from the rafters. Unfortunately even though the instructions specifically said that the opening was supposed to be 22 1/2" x 54" the ladder was about 3/4" shorter in each dimension. I really didn't want to have 3/4" on one side of the ladder so I purchased a 1x4 (which is really 3/4" on one dimension) to fill in that space. I took Friday night off and wanted to get done on Saturday.
I removed some of the nails I had initially put in and attempted to fit the 3/4" board in the space between the truss and the ladder. It wasn't 3/4" the whole way, so I had to sledge hammer the board in as far as possible. I could then start the final nailing of the ladder to the attic. I wanted the ladder to hang straight, so I used a level at the top. The instructions indicated that there are six places where you put a nail through a metal brace and drive it home to transfer as much of the motion during use directly to the supporting beams. Unfortunately they put those holes really close to the spring and I only have a hammer with a really large face. I spent the next hour or so hammering, unbending the nail, hammering some more, unbending the nail, pulling out nails that were completely bent, hammering in new ones. I was pretty happy that all of the nails were fully installed and there wasn't going to be any damage due to the nails coming loose.
One step remained to actually have the ladder in the attic, cutting the legs.
Like I said earlier, the reason the ladder failed initially was that the legs were never cut. If you don't cut the legs you put a lot of stress on the wood in places it's not designed to receive. Fortunately the instructions are simple, fold the bottom most section up out of the way and measure how far it is from the end of each side of each board to the floor. They cut it at the factory square, but you cut it at an angle to match the floor. Fortunately the measured spots ended up just below the metal rod that supports the bottom most step. Due to the sloped nature of the garage floor the side nearer the garage door is slightly lower. I cut the legs and the garage door side was 1/4" too long. I cut that off too and the bottom most step is almost on the floor, but it is very stable, something I've never felt in a garage ladder at our house.
Now all that remained was the minor job of repairing the sheetrock since it is the firewall for the house. I had the piece that I had cut out for the new ladder, but there wasn't enough to cover all of the opening that was there so I bought an entire 4x8' sheet bummed that I was only going to use about 2x5' but they don't sell it any smaller.
I got home and cut out the damaged pieces and was ready to cut one more piece and the whole area fell out of the ceiling.
 Since I had an 8' long piece, I went ahead and cut it all the way back to where it wasn't damaged almost 8' and all 4' across. The only thing we had to do was cut out a little in where the door was and take about an inch off the end since the trusses weren't exactly 8' apart. We measured the required opening, cut the sheetrock and test fit it. It didn't fit. I had to cut an additional 1/2" or so off one end in order to get it to fit. The cut I had made wasn't very square and it was interfering. Once we got it up there, we put drywall screws about every 6 inches and held it in place. Sheetrock is pretty heavy, and this was only 1/4" stuff, I can't imagine anything heavier in that spot. We would have had to have some sort of jack, instead we just used our heads, literally.
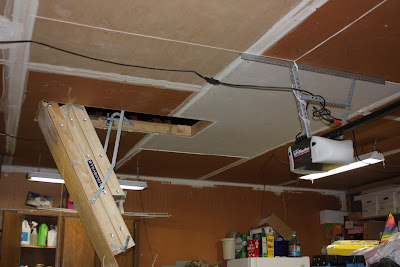
So, now that the trusses are repaired, the ladder is installed, the sheetrock is replaced, all we have to do is put the "flooring" back in up in the attic. The previous installation had two 8' sections of 1/4" plywood as the floor. Since the ladder has changed in position and orientation, we'll need to cut those pieces to fit, and get some more for the other side. Otherwise you can't really put anything in the attic without it sitting on the weak sheetrock.